Tutorial: How to Send WhatsApp Messages from IoT Devices (ESP8266 - Wemos D1 Mini) Using Arduino IDE
Are you looking for an easy way to send WhatsApp messages from your IoT devices? In this tutorial, I will guide you through the process step by step. Let's get started!
Supplies
- Wemos D1 Mini
- Access to Wi-Fi
- Arduino IDE
- Opened whatabot.net in your browser
To begin, follow these steps:

Add this: in your additional boards manager URL list in your Arduino IDE.
- Open the Arduino IDE and navigate to "File."
- Click on "Preferences."
- In the "Additional Boards Manager URLs" field, add the following URL: http://arduino.esp8266.com/stable/package_esp8266com_index.json
- Next, download the ESP8266 boards:


Go to "Tools" > "Board" > "Boards Manager" in the Arduino IDE.
Search for "esp8266" and click on "Install."
Now, select the specific board you have:

In this case we choose "LOLIN(WEMOS) D1 R2 & mini" from the list of available boards.
Once you have completed the above steps, follow the instructions on whatabot.net:

Visit whatabot.net and follow the provided steps.
- Add the phone number displayed on the website to your contacts.
- Send the following WhatsApp message to that number: "I allow whatabot to send me messages."
- Copy and save the link that is sent to you by whatabot.
To proceed, download or clone the code from the GitHub repository:

GitHub Repository:

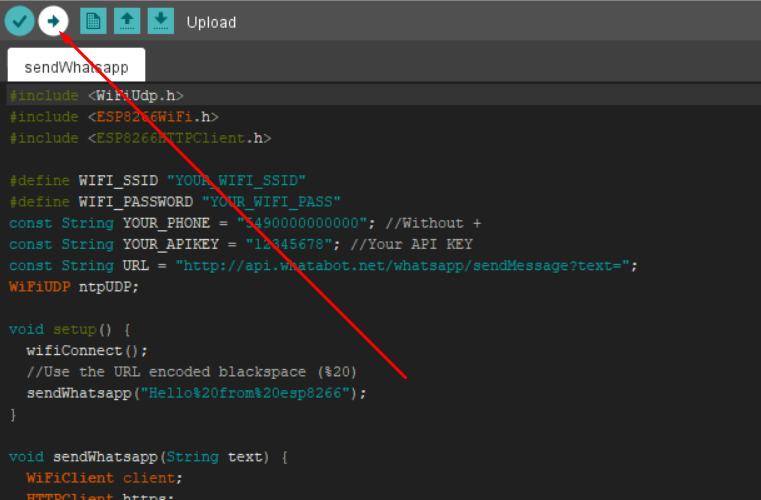
Afterward, replace the following variables in the code with your own data:
Variables needed:
1 - WIFI_SSID "YOUR_WIFI_SSID"
2 - WIFI_PASSWORD "YOUR_WIFI_PASS"
3 - YOUR_PHONE = "YOUR_PHONE_NUMBER"; //Without +
4 - YOUR_APIKEY = "API_KEY_WHATABOT_SENT_YOU"; //Your API KEY
For example:
1 - WIFI_SSID "Natalab"
2 - WIFI_PASSWORD "1234567890"
3 - YOUR_PHONE = "5490000000000";
4 - YOUR_APIKEY = "42536475"
Once you have updated the variables, upload the code to your board and start receiving WhatsApp messages.
Troubleshooting
If your board is not recognized, please refer to the instructions provided in this link:
https://www.instructables.com/Instalar-driver-para-CH340G/

Comentarios
Publicar un comentario